|
Object Constraints command |
Scroll |
To preview or remove object constraints, use the Object Constraints  command.

Step-by-step instructions
1.Select an object for viewing its constraints.
The name of the selected object will appear in the Object field on the Parameter Panel, and the Constraints field will display the list of constraints imposed on it.
The graphic area will display only icons for constraints of this object. If any constraint links the object to another object, the icon of this constraint is also displayed for that other object. Icons of all other constraints are hidden.
Next to the selected object in the graphic area, a additional panel with constraint buttons appears.
|
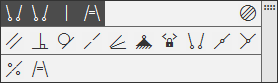
Additional Constraints Panel
The background color of the buttons is different:
•Dark gray — constraints applied to the selected object.
•Light gray — constraints that can be created for the selected object.
Buttons for the constraints applied to the object are located in the top row of the panel (the row is displayed if the selected object has constraints). This row also contains the Delete all constraints button  (the operation of the button is described below).
|
If the Object Constraints command is run by double-clicking the constraint icon in the graphic area, the object linked to that icon is automatically selected for viewing constraints. |

|
•The object can be selected before running the command, including with the help of Marquees. •To select closely located objects (e.g. points on curve) you can use the command Picking Over. |

2.You may view objects associated with the current one within the constraints applied to it. There are two methods for this:
•Select the row of the required constraint in the Constraints list of the Parameter Panel. The object that, along with the current one, is involved in this constraint will be highlighted in the graphic area (the highlight color can be changed when). settings). Simultaneously the button of the selected constraint on the additional constraints panel will be highlighted; in the graphic area — the object included in that constraint, and the constraint icon next to it.
If you need to reset the selection in the list, click on the selected row while holding the <Ctrl> key.
•Move the cursor to the icon of the required constraint in the graphics area. If an icon is marked with a dot (i.e., the constraint is part of a group of similar constraints), then when you hover the cursor, icons of other constraints of the same type applied to the object will appear. Hover the pointer over the relevant icon. It will be highlighted. Simultaneously the other object, included in that constraint, and constraint icon next to it will be highlighted, too.
3.If you need to remove an object constraint, use one of the following methods:
•In the graphical area — select the constraint icon and press the <Delete> key;
•on the additional constraints panel:
•Press the constraints button (buttons with applied constraints have a dark grey background); after removing the constraint, the button disappears from the panel.
•To delete all constraints from the object at once, press the Delete all constraints button in the constraints applied line; after the constraints are deleted, the line will no longer be displayed.
•The Parameters toolbar panel will display the styles from the attached file in the list with the help of the Constraints:
•place the mouse pointer on the constraint row in the list and click the icon in this row;
•To remove one or more constraints, select the constraint row in the list and click Delete  button next to the list (the button appears after selecting the row); this method can be used to delete either a single constraint or multiple constraints;
•To delete all object constraints at once, click the Delete all constraints button next to the list.
4.If necessary, you can add constraints to the current object without completing the work of the command. For this purpose, you can use:
•The list of constraint creation commands, located on the Parameter Panel below the field Constraints (the list contains commands only for those constraints that can be applied to objects of this type),
•buttons on the additional constraint toolbar, corresponding to the commands in the constraint list.
To impose a constraint on the object, click the required command in the list or press the button on the additional panel. The sub-process for the creation of the constraint will be started. Perform the necessary actions in that sub-process (creation of various constraints is described in the Application of constraints manually). When you finish adding constraints, the software will return to the process of viewing constraints for the current object. The newly created constraint will be added to the list of Constraints.
|
The sub-process is not started for some constraints like the Fixed Length constraint. This constraint and some others are created by just clicking the corresponding command in the list/button on the additional panel. |
|
The command list/buttons of the additional panel allow applying constraints not only to the current object but also to other objects by selecting them in the sub-process for constraint creation. After you finish the subprocess, the system returns to the process of viewing constraints for the current object; constraint icons added to other objects are hidden. |
5.When the work with the constraints of the current object is completed, you can choose another object by selecting it in the graphic area.
6.To finish execution of the command, press Complete  button.
See Also