|
New Table dialog |
Scroll |
This dialog appears on the screen after you run the command to insert a table into a graphic, text document, or a model, as well as after clicking the Add... button. Title block creation dialog.

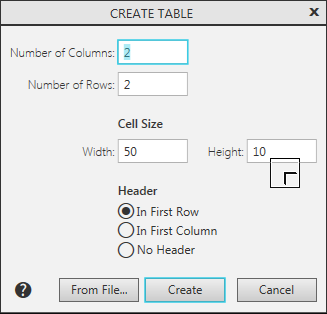
In it, you can set the parameters for the newly created table.
Description of Controls
Name |
Description |
|
Number of Columns |
In this field you can enter the number of columns of the new table. |
|
Number of Rows |
In this field you can enter the number of rows of the new table. |
|
Cell Size |
In these fields you can assign Width and Height new table cells (in millimeters). |
|
Header |
Use the toggle switches to select where in the table the heading will be located (header). For the header cells, the appropriate text style is automatically set. The cap can be placed in the first row or the first column. You can also refuse to create it. |
|
From file |
When creating a table, you can use the table previously created and saved in a separate file as a prototype. To read the table in the dialog that appears after clicking the button, select the file type and select the file itself. The following file types are available: •*.tbl — special KOMPAS-3D format for storing tables. •*.frw — fragment KOMPAS-3D. The fragment should contain the image of the table, composed of segments and texts. In case of generating the table automatically from a fragment, all the texts, horizontal and vertical segments existing in that document are taken into account. Other objects in the formation of the table are not involved. Text and line styles are saved in the resulting table (in the form of cell style texts and cell framing styles). |
To continue working with the table after setting all the parameters, press Create button. The dialog will close. The table will be displayed in the mode of setting the table of the title block.
To exit the dialog without creating a new table, click Cancel.