|
Dialog for creating and editing hyperlinks |
Scroll |
Allows you to create new hyperlinks in a graphic document or a sketch, edit or delete existing ones.

In the left part of the dialog there are buttons with which the type of hyperlink is chosen. After clicking the button, the dialog changes its appearance – controls appear in it for creating or editing the selected type of hyperlink:
To remove a hyperlink, click Delete link. The button appears in the dialog box when editing a hyperlink. Clicking this button closes the dialog box.
To confirm the entered parameters or changes made, click the Apply button. The button is available if the field containing the address or object name has been filled in.
To exit the dialog without saving changes, click the Cancel button.
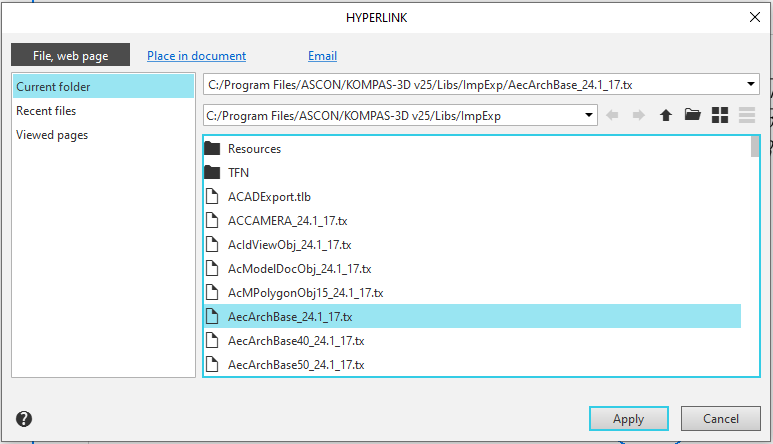
Use this page to create a hyperlink to a file or web page.
The page is divided into two parts: the left side contains a list of object types for hyperlinks, while the right side contains fields for specifying the path to the target object of the selected type, as well as a preview pane.
Description of Controls
Element |
Description |
|
Address field |
A field that displays the path to a file or folder, or the address of the selected web page. To specify the target object—a file, folder, or web page—click in the preview window. After selecting the target object, its path or address appears in the field. If necessary, you can enter the path manually or select it from the drop-down list. A list of recent paths and addresses appears when you click the icon |
|
Current folder |
The list box allows you to select any file or folder as the target of a hyperlink. When you select this line, a group of controls appears on the right side of the dialog box that allows you to specify the path to the file or folder. A description of these controls is provided below. |
|
Field for specifying the path to the folder |
This field allows you to select a drive or folder to display its contents in the preview window. When you click the icon |
|
|
The Back button takes you to the folder you were viewing immediately before the current one. |
|
|
The Forward button takes you to the folder that was open when the Back button was pressed. The button is unavailable if you haven't navigated backward. |
|
|
The Parent Directory button takes you to the folder one level above the current one. |
|
|
The Open button opens the standard file selection dialog. In this dialog, navigate to the folder, select the file, and click Open. The selected folder becomes the current folder (its contents are displayed in the preview pane), and the file path is entered into the address field. |
|
|
The Detailed View button allows you to display the contents of the preview pane as a multi-column list. |
|
|
The List button displays the contents of the folder in the view pane as a single-column list. |
|
Recent files |
The list item allows you to select one of the most recently used files as the target for a hyperlink. The list of recent files is displayed in the preview pane. |
|
Viewed pages |
The list item allows you to select one of the most recently viewed web pages as the destination for a hyperlink. The list of web pages is displayed in the browser window. |
|
Viewing window |
This window is used to display objects of the selected type. |


After creating a hyperlink, the tooltip displays the path to the file (folder) or the web address.
When a hyperlink is activated, folders open in the file manager, files open in the application associated with that file type in the operating system, and web pages open in a web browser.
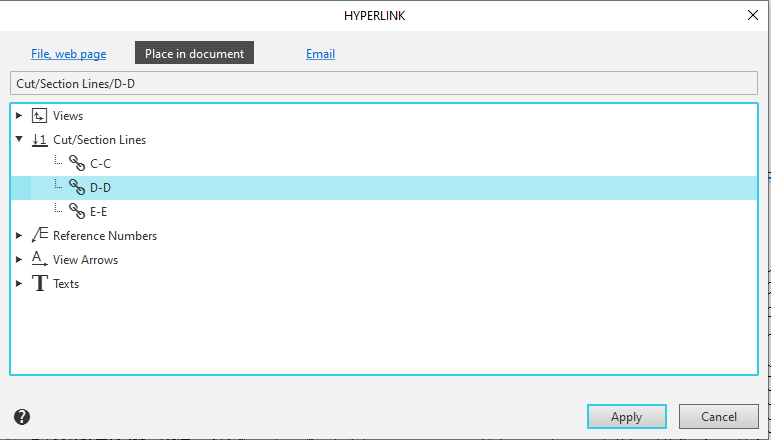
You can use this page to create a hyperlink to an object in the current document.
Description of Controls
Element |
Description |
|
Field for the object name |
The field that displays the name of the object to be used for the hyperlink. Cannot be edited manually. The name appears in the field after selecting the target object in the preview window. |
|
Viewing window |
This window contains groups of objects in the current document that you can link to. You can expand and collapse groups by clicking on the icons Select an object by clicking on it. The object selected in the field is highlighted in the document. |
 and
and  in the rows containing their names.
After creating a hyperlink, the tooltip displays the names of the document and the target object.
When the hyperlink is activated, the document navigates to the section where the target object is located. The center of the target object will be positioned in the center of the screen.
|
If the target of a hyperlink is in a dimmed state or within a layer, it cannot be activated. |

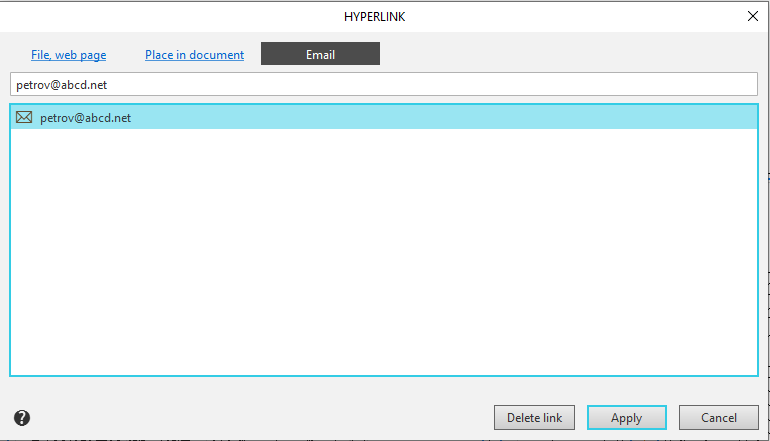
Use this page to create a hyperlink to an email address.
Description of Controls
Element |
Description |
|
Address field |
A field for entering the recipient's email address. You can type the address manually or select an email address from the list. |
|
Viewing window |
This window displays the email addresses used for hyperlinks during the current session on KOMPAS-3D. |
After creating the hyperlink, the tooltip displays the email address.
When you click the hyperlink, you are taken to your email application, and the entered address is automatically placed in the To: field of the new message window.
