|
Column settings |
Scroll |
By default, the Property Editor contains columns with properties connected to the document. Each column in the Editor corresponds to one property.
To change the set of properties displayed in the Editor, click the Column Settings  button. In the dialog box that appears on the screen, you can form a set of properties to be displayed and configure their mutual position (see Figure).
|
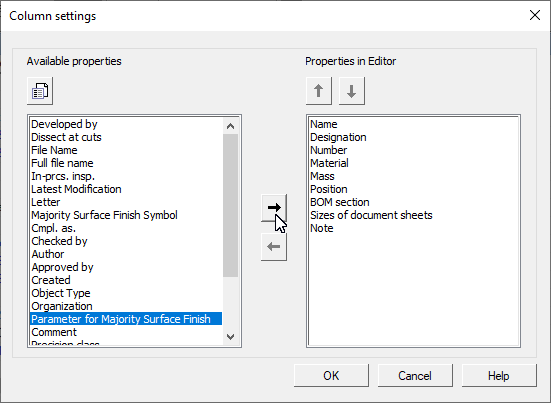
Column Settings dialog box in the Property Editor
The dialog box lists local properties of the document. Out of these properties, the document properties available for selection are contained in the Available Properties window and the properties selected to be displayed in the Editor are contained in the Displayed Properties window.
To add a property to the list of displayed properties, select it in the Available Properties window and click the Move Right  button. The property will be moved to the Displayed Properties window.
To delete a property from the list of displayed properties, select it in the window Displayed Properties and click the Move Left button  . The property will be deleted from this window and will appear in the Available Properties window.
If necessary, you can change the list of available properties. To do so, click Property Management  . The Property Management dialog box that appears on the screen allows you to add a property to a document, create a new property, attach a new or previously created property. An attached property automatically appears in the Displayed Properties window. For working in the dialog Property Management, see section Property Management.
You can change the order of properties in the Property Editor by moving them in the Displayed Properties window. To do this, select the property you want to move and click Move up  /Move down
  . This button is available if the property can be moved to the specified position.
|
The Name property cannot be moved or deleted from the list of displayed properties. |

Click OK after completing columns setup.