|
Simple radial dimension |
Scroll |
To build a radial dimension, follow these steps.
1.Run the Radial Dimension  command.

2.Specify a circle (or circle arc) to be dimensioned. Its name will be displayed in the Objects field, and the graphic area will display a phantom of the dimension.
3.Select dimension line type using the Type group of buttons:
From center,
 Not from center.
|
|
|
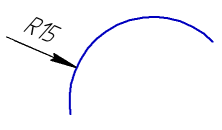
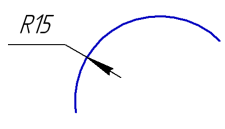
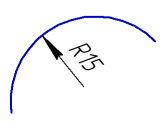
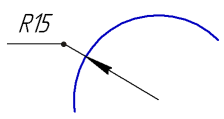
Examples of setting radial dimension not from center
4.Edit the dimension text, if required. To start working with the dimension text, press any alphanumeric key. See section on editing the dimension label...
5.Set the number of decimal places in the dimension text. Details...
6.Set a dimension tolerance. Details...
7.Set up additional dimension parameters, if required: dimension text placement option, arrow display parameters, etc. Details...
8.Set the point defining the dimensional line location. After this point is specified, dimension creation is automatically completed.
The point can be specified inside or outside the circle.
•If you select automatic, fixed or manual placement of the dimension text, the specified point also defines the text position (see Fig. a).
•If you select to place the dimension text on the landing, the point defines dimensional line location and the landing start (see Fig. b).
9.To complete operation of the command, click Finish  .
.
|
|
a) |
b) |
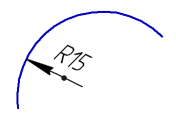
a) with auto-placed text; b) with text on the landing
|
To set dimensions for equal radii on a single landing, use landings with multiple branches (see section Radial dimension on the branched landing). |

|
When editing the projection dimension some elements of the Parameter Panel are unavailable. |
See Also