|
Report type configuration |
Scroll |
When creating report, you can configure the style of its display. To select a style, use the Style list located in the Report Format section of the Parameters Panel. If needed, you can change the properties of the selected style. To that end, use the Report Style dialog (see the figure).
|
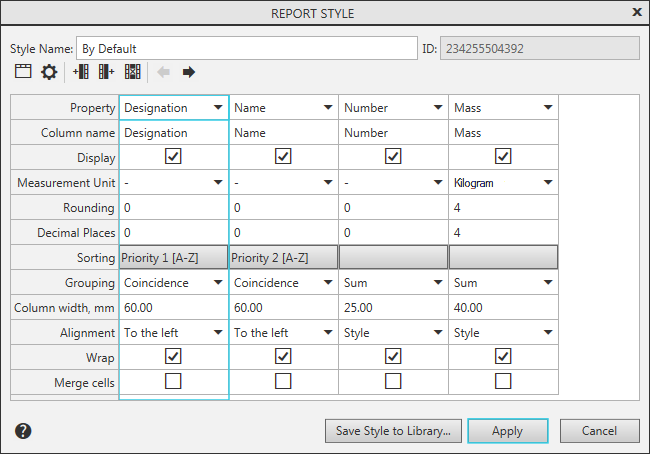
Report Style setup dialog
Step-by-step instructions
1.Invoke the Report Style setup dialog by pressing the Set report style... button  to the right of field Style . The style setting dialog will be displayed.
The set of columns in the dialog depends on the selected style. For the By Default style, the dialog contains columns with Designation, Name, Quantity, and Mass properties, while for the By all properties style — all local document properties.
2.Create a set of columns for the report table. Each column corresponds to one property of the object included in the report. Operations with columns — add, delete, move — are performed using the toolbar buttons. The columns are displayed in the dialog settings window.
3.Configure the parameters of report columns. Details...
4.If necessary, configure the title block of the report table. To do this, click the Title  button on the toolbar and perform the necessary actions in the Table Header dialog. To learn about working in the header settings dialog...
5.Configure the report detailing. To do this, press the Checkout  button and perform the required actions in the same-named dialog. For more details on working in the detailing setup dialog...
6.If you want to save the style to the library, specify the style name in the Style Name field, click the Save Style to Library button, and specify the library file in the dialog that appears.
7.To finalize the style setup, click Apply.