|
Area |
Scroll |
To determine the area of an arbitrary shape, use the Area  command.

Step-by-step instructions
1.Hover the cursor over the object whose area you want to measure. The measurement result will appear next to the cursor.
By default, edges are highlighted in the graphics area. If you need to measure the area of a solid or a surface, enable the corresponding filters on the Quick Access Panel and hover the cursor over the object again. This allows you to quickly view the areas of objects.
If you want to display the measurement results in the Information Window, select the desired objects.
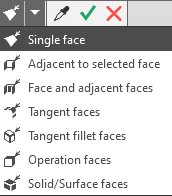

The selected object is highlighted in the graphics area, and its name is added to the Objects field on the Options Bar. The measurement result appears in the Information Window.
If multiple objects are selected, the Information Window displays a list of measured areas, with the sum of all obtained values shown at the end.
If an object is selected again, the highlight is removed from it, the corresponding area value is excluded from the list, and the sum of the values is recalculated. You can also exclude an object from the list by deleting its name from the Objects field.
|
You can select the measurement targets before executing the command. In this case, an information window displaying the measurement results appears on the screen after the command is executed. |

2.Configure the measurement settings in the Information Format section. Learn more...
This setting applies to all measurement results displayed in the Information Window.
2.If you need to save or print the measurement results, use the commands in the Information Window menu.
3.You can create an object «measurement» (contains an object/objects, parameters, and measurement results). To do this, click the Create Object button.
In the Construction Tree, under the Measurements section, an Area object with the corresponding icon will appear.
2.To complete the command, click the Finish button or close the Information Window.
|
The margin of error in area calculations depends on the precision setting for the CMP. |
See also
