|
Relief Construction |
Scroll |
The Relief command is used to create relief on a body face  .
.

Procedure
1.Select a relief rendering option using the Result button group on the Parameters Panel:
 Jut — The relief is created by adding material,
 Cut — The relief is created by removing material.
2.Select a face or a set of faces to create a relief. All selected faces must belong to the same solid.
For a single selection, you can choose a face or a group of faces united by a single attribute. This depends on the method set in the Quick Access Toolbar.
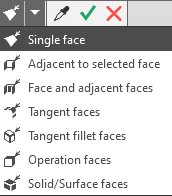
The selected faces are highlighted, and their names appear in the Faces field.
3.Identify the features that define the relief contour.
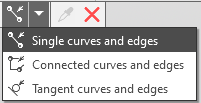
Requirements for the contour and its impact on the construction result
The names of these objects are displayed in the Curves field on the Parameters Panel.
After defining the base faces and closed contours, the relief phantom appears in the graphics area.
4.Set the relief depth in the Distance field.
5.If necessary, specify the operation name and the display properties of its surface using the controls in the Properties section. For more information, see the section Controlling the color and optical properties of objects.
6.To complete the operation, click the Create Object  button.
After confirming the operation on the selected faces, a relief appears, and the corresponding icon appears in the Design Tree .
7.To finish the task, click the Finish button  .
.
Tips
•You can use the geometrical calculator commands to set the elevation value.
•You can set a tolerance for the elevation value. To do this, select the Tolerance command from the Parameter menu, or click the icon  , displayed in the parameter field (the icon appears if a tolerance has been assigned to the parameter value). Learn more about the purpose of the permit...
See also
