|
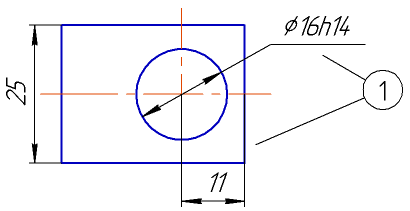
Modification designation |
Scroll |
The leader line for placing the modification designation is created by the Change Mark  command.

Step-by-step instructions
1.Set a point to which the first branch of the leader line points.
After indication of this point, a designation phantom will appear in the graphic area.
2.Indicate the point determining the position of signage.
|
To set the position of designation points, you can use Snaps and geometrical calculator. |

3.Create the required number of branches of the leader line. Details...
4.The number of change suggested by the system is displayed on the phantom of signage and in the Text field on the Parameter Panel. If required, you can Edit the caption and/or its outline.
5.Set up the Parameters of the sign.
6.To complete changes of the designation, click Create object  .
.
7.To complete operation of the command, click Finish  .
.
|
Labeling the modification designation