|
Rotation |
Scroll |
To rotate selected objects around the defined center, use the Rotate  command.

Step-by-step instructions
1.Select the objects to rotate. To do this, specify the required objects in the Object selection Select the required objects and click Create Object  . In the Parameter Toolbar, the rotation controls will appear.
|
If the objects are specified before the Rotation command is invoked, then the subprocess of selecting objects is not launched. The system proceeds immediately to the rotation command execution. |

Names of the selected objects are displayed in the Objects field of the Parameter Panel.
2.Set the rotation center point.
3.Set the new position for the selected objects using one of the methods:
•specify the base point for the rotation, and then set the new position for this point;
•set the rotation angle for the objects in the Rotation Angle field.
The rotation will be automatically completed.
|
To position the cursor precisely and to set the operation parameters you can use snaps and geometrical calculator. |

4.To complete operation of the command, click Finish  .
.
|
|
a) |
b) |
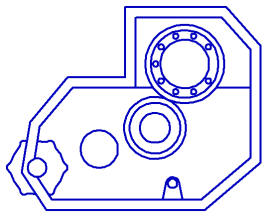
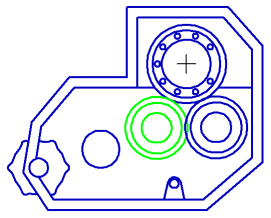
Performing rotation
a) the original image, b) the image after rotating the hole
(the rotation center is marked with a cross)
|
Sometimes you need to rotate only some of the geometric objects composing an image, and to rearrange appropriately the rest. You can do such editing using the Transformation by Rotation. |