|
Mirroring |
Scroll |
To place selected objects symmetrically relative to the set axis, use the Mirror  command.

Step-by-step instructions
1.Select the objects to position symmetrically. To do this, specify the required objects in the Object selection Select the required objects and click Create Object  . In the Parameter Toolbar, the symmetric placement controls will appear.
|
If the objects are specified before the Symmetry command is invoked, then the subprocess of selecting objects is not launched. The system proceeds immediately to the symmetrical positioning command execution. |

Names of the selected objects are displayed in the Objects field.
The object selected for transformation may contain text. The Mirror Texts option allows to determine how the text will look after the symmetry transformation. If the option is enabled, the text will be mirrored, if it is disabled, it will remain as is.
|
The option does not apply to the text of the designations selected to transform the symmetry. |
2.Set the symmetry axis using one of the methods:
•specify two points the axis goes through;
•specify a point and set the slope angle of the symmetry axis to the X axis of the current coordinate system in the Symmetry axis slope angle field;
•select an existing straight–line object – activate the Symmetry axis field, then specify the desired object in the graphic area.
When the symmetry axis is specified, the transformation will be automatically completed.
|
To position the cursor precisely and to set the operation parameters you can use snaps and geometrical calculator. |

3.To complete operation of the command, click Finish  .
.
|
|
a) |
b) |
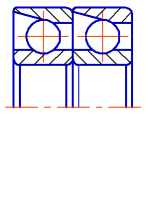
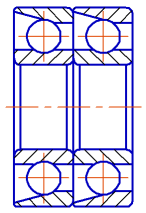
Transforming symmetry
a) the original image, b) the command execution result
Additional object transformation options...
See Also